MOUNTING THE EXTERNAL OIL COOLER
1. Locate the floor beams between the main frame and the outside rocker

2. Hold cooler up and mark the holes in black sharpie.


3. Once you’re sure this is where you want it, scribe the holes. The black marks you made will help you see your scribe marks better

4. Next you want to punch holes with a center punch. Pay close attention as there is not much room here. Be sure to get it as centered as possible so that you do not end up drilling through a side, causing your cooler to not mount properly.

5. Next, you’ll want to drill the holes with a 1/4” drill bit. Again, make sure you are in the center!


6. Make 1” spacers for the rear of cooler (we used a chrome Molly push rod). This is to create an angle so that the air will flow through the cooler.

7. Use 6mm bolts & Nylocks to mount

Congrats, you now have an external oil cooler mounted under your early bus! Here's about what it should look like:
- Rear view of cooler with 1" spacers


- Front mounted flush

- Angle created by 1" spacers


MOUNTING THE OIL FILTER
1. Drill holes and create a small spacer to make up the gap between the frame and the filter backet

Here's what they look like


ROUTING OIL HOSES
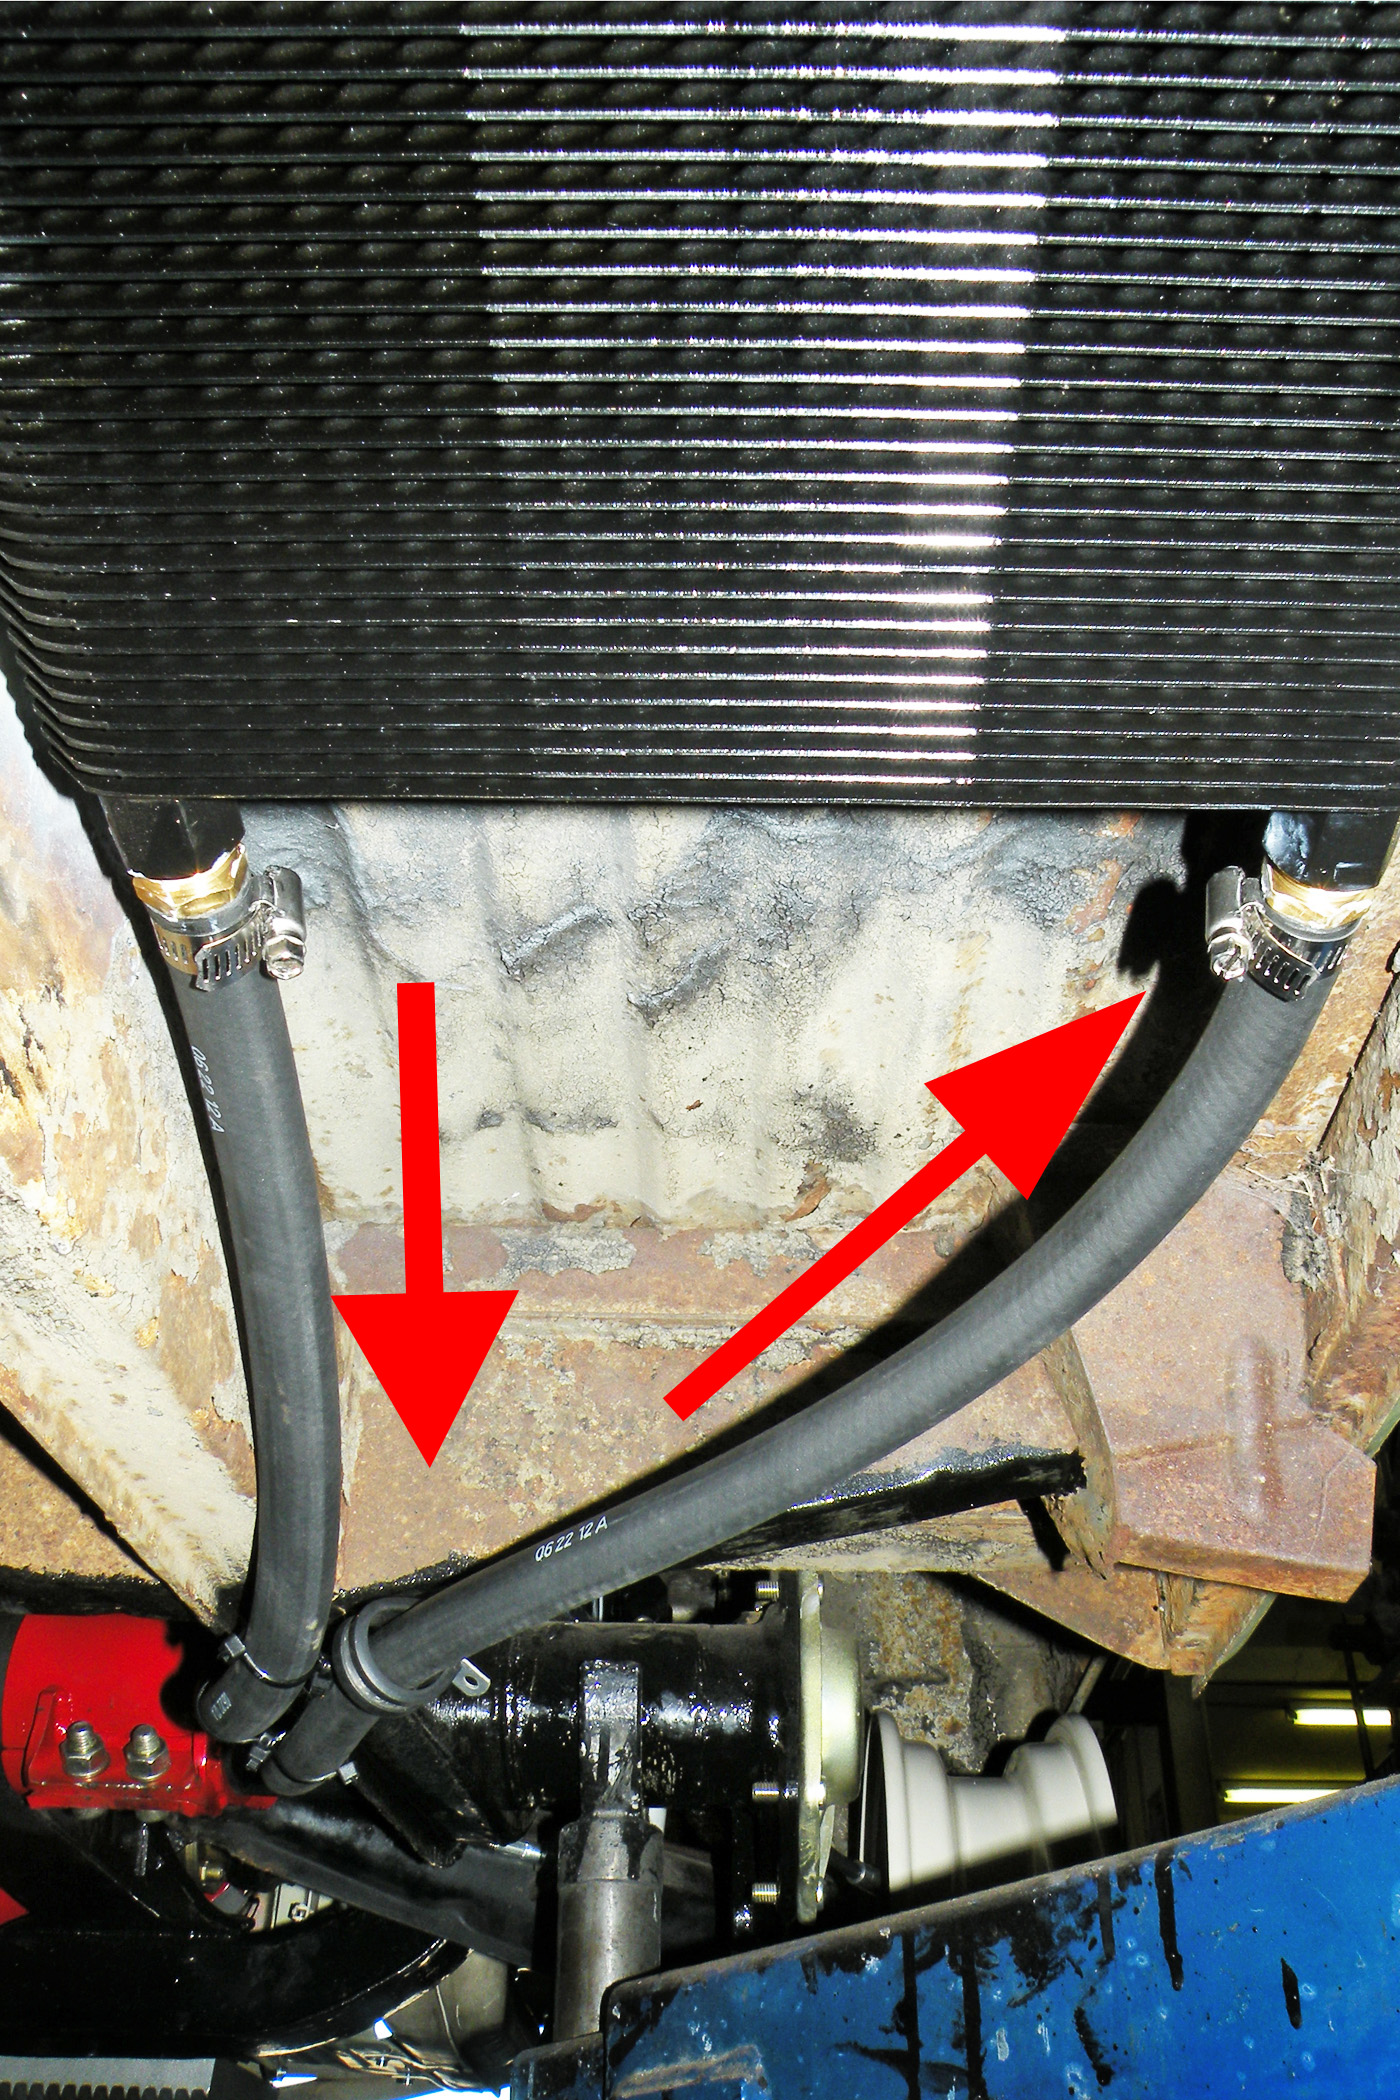
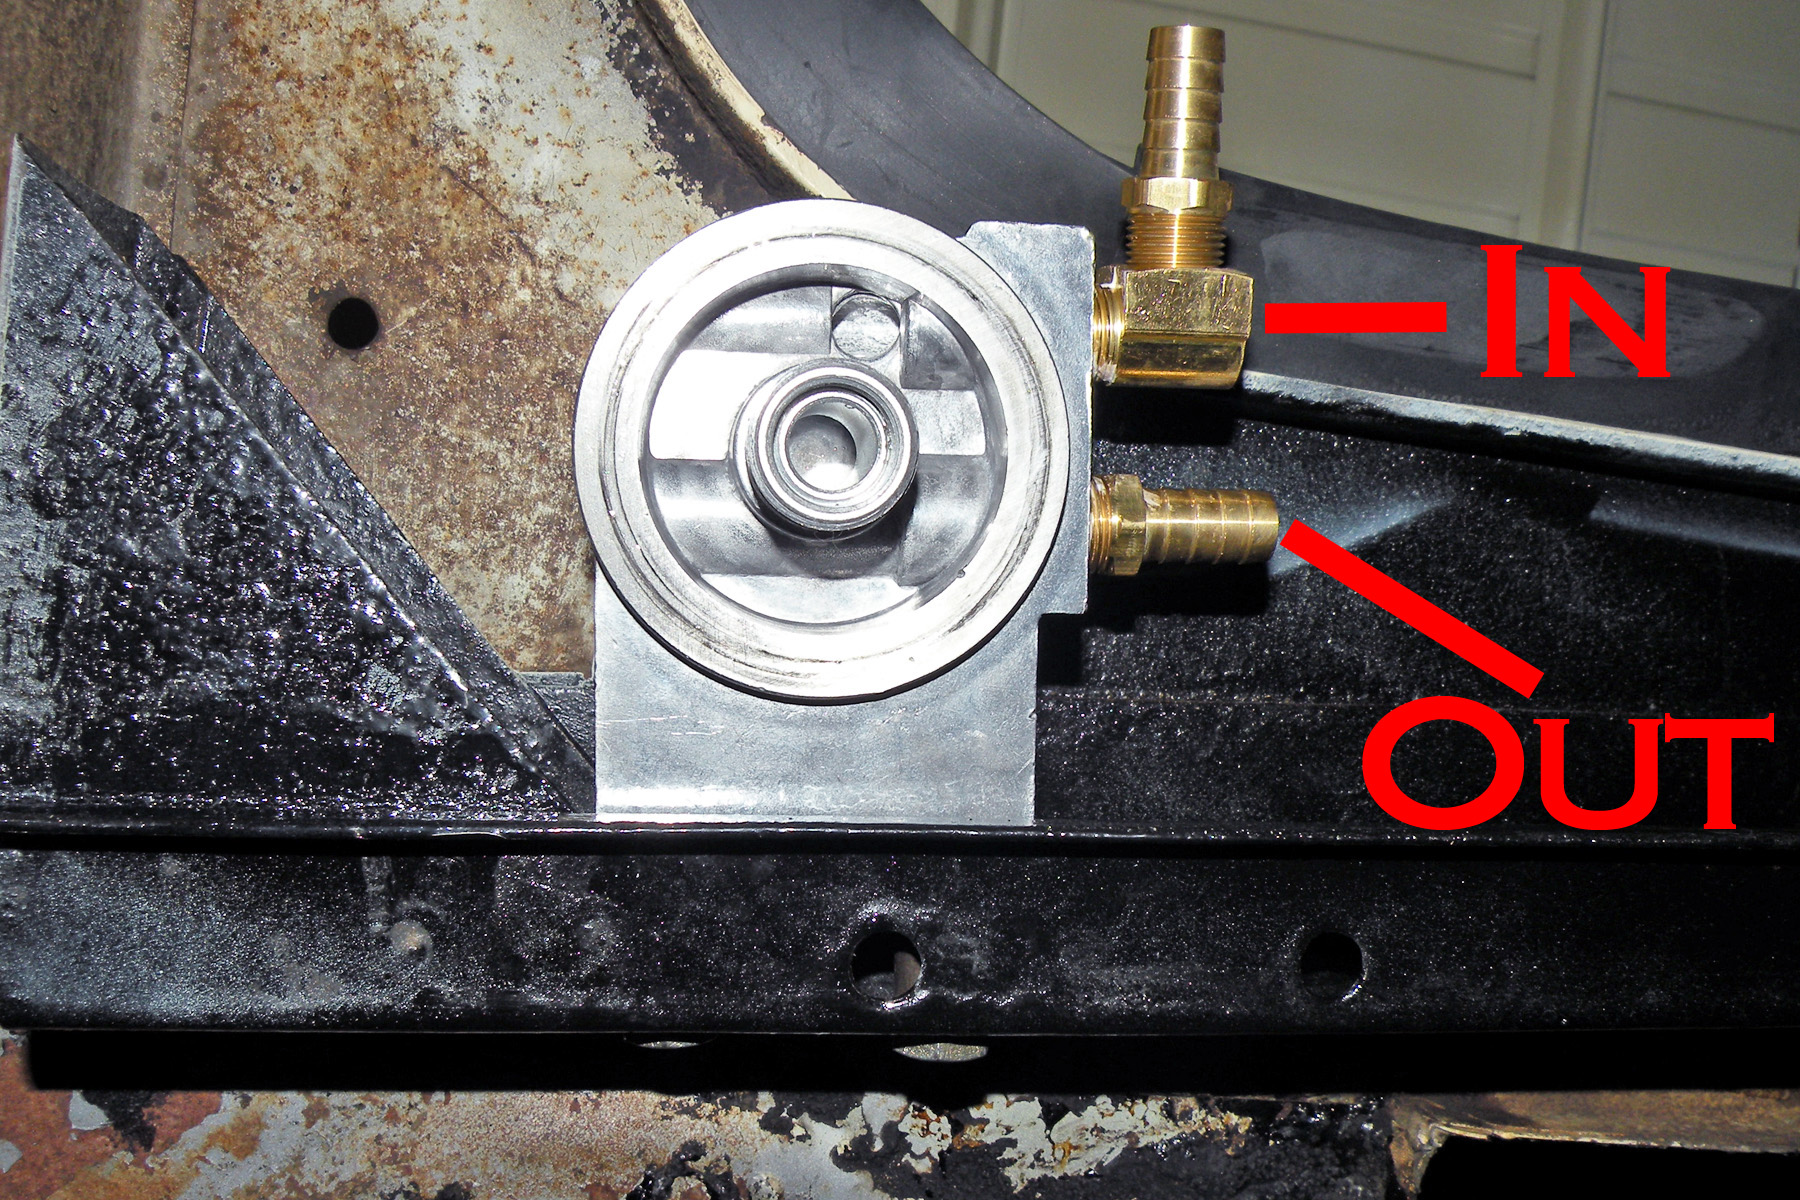
Routing the hose will be from the oil pump to the “IN” on the filter (The 90 degree fitting) and from the "OUT" of the filter along the main frame to the outer fitting on the oil cooler. Then the inner cooler fitting along the hose that you just ran to the case return fitting.

Though the hoses are zip tied together, make sure there is a zip tie to separate them because you don’t want the hot hose to warm up the cool one.


You’ll need large ties to hold the hose to the frame. The return hose is what the large ties hold. This shows the hoses being routed over the fork hanger.

